Project Introduction
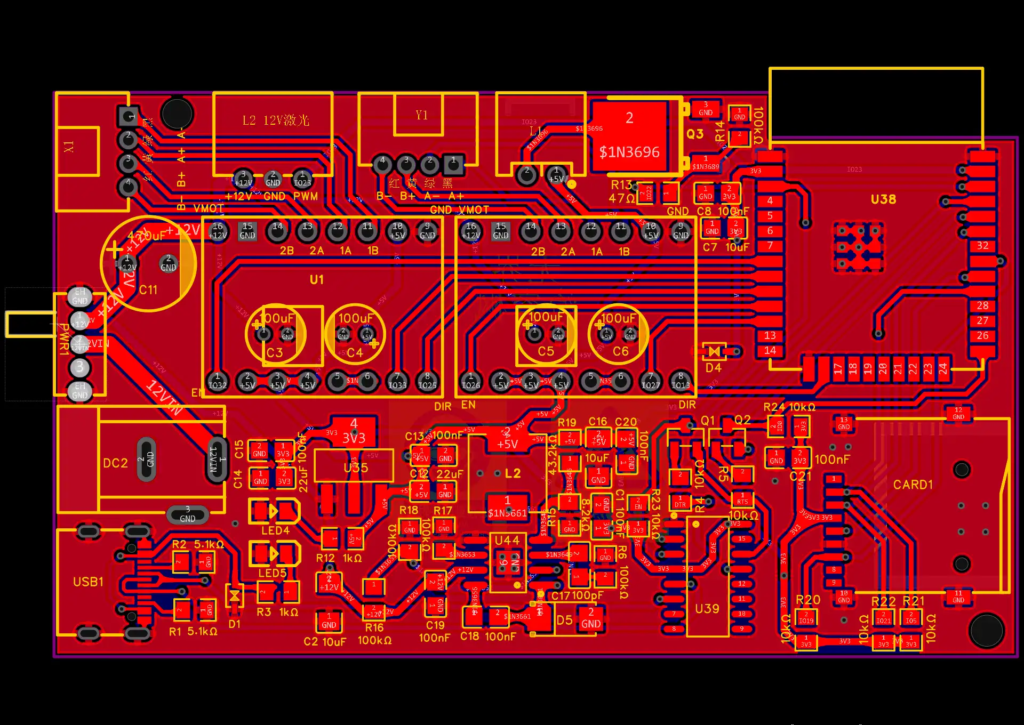
This project is designed based on the GITHUB open-source project Fluid NC. The open-source content includes the implementation scheme, circuit board, and mechanical structure of the engraving machine designed by myself.
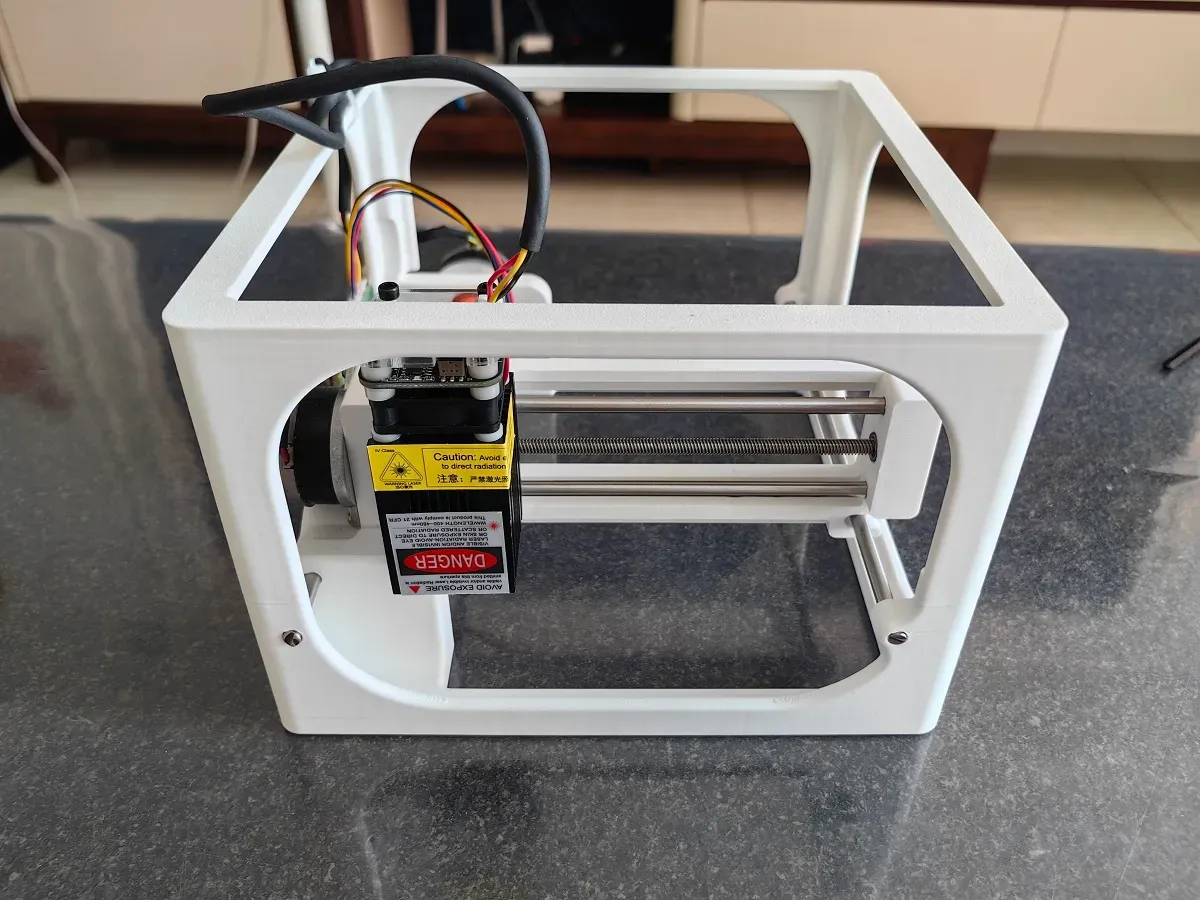
The engraving machine is derived from my previously open source Wujie No.2 extended effective stroke and equipped with a 2.5W laser head, giving it certain tool properties.
Three quarters of the cost of this project lies in the laser head. The Boundless PLUS has the ability to support laser heads of 250mw, 500mw, 1000MW, 1600MW, 2300mw, and 2500MW, which can be selected according to actual needs.
Similarly, the 3D printing model is open sourced in Makerford, and the 3D printing file portal for the carving machine body is as follows: https://makerworld.com.cn/zh/models/1461574-wu-xian-ji-guang-diao-ke-ji-wu-jie-plu-s#profileId -1591303
The 3D printing file of the carving machine body is placed in Makerworld to earn points. I hope everyone who has a voucher can help me with some assistance. Thank you very much.
Project Function
Using a 2.5W laser head, the effective carving stroke is 120mm * 110mm,
It can carve on materials such as plastic, cardboard, wood, painted metal, leather, etc. It can cut 2-3MM thick cardboard and acrylic carving, which needs to be covered with dark film.
Materials that cannot be carved: non painted metals, aluminum alloys, stone, glass, etc
Hardware Description
Due to the installation of a 2.5W laser head, the power requirements for the laser engraving machine are 12V, 2.5A, and Bluetooth or WIFI communication with mobile phones or computers, freeing them from the constraints of data cable connections. The carving range is 120mm to 110mm. The open source software LaserGrbl is used for computer software, and MKSlaser is used for mobile software. MKSlaser requires uploading the carving file to the memory card of the carving machine before carving. When using the memory card, it must be in WIFI mode. Bluetooth mode does not support transferring files to the memory card.
1) The project controller is developed using ESP32 microcontroller, which can use compatible chips and costs about 9 yuan. It supports serial ports WIFI、 There are three connection methods for Bluetooth, but limited by ESP32 chip resources, Bluetooth and WIFI can only support one at a time. The serial port can be used simultaneously with Bluetooth or WIFI.
Special note: The 3.3V power required for the ESP32 chip is stepped down from the 12V power supply. If firmware or configuration files need to be written using a serial port, they must be connected simultaneously to the 12V power supply and TYPE-C interface. A single TYPE-C data cable cannot be used to write firmware or configuration files through the serial port.
2) The stepper motor adopts a 36 round cake stepper motor, and the cost of disassembling the motor is 5-8 yuan (generally not included in postage), with a step angle of 0.9 degrees, an output shaft diameter of 5mm, and a length of 8.5mm
3) Motor lead screw: T5 lead screw, diameter 5mm, length 150mm, lead 4mm (lead screw rotates 4mm), cost about 14 yuan. Wujie PLUS replaces the lead of the lead screw with 4, which ensures smoother and quieter operation while meeting accuracy requirements.
4) The optical axis adopts 4 pieces with a diameter of 5mm, 2 pieces with an X-axis length of 160mm, and 2 pieces with a Y-axis length of 200mm. The optical axis with a length of 160mm needs to be customized for cutting.
5) The motor drive adopts A4988, with a cost of about 3.5 yuan per unit, requiring two. The drive adopts 16 subdivision mode, and the motor rotates once, requiring 360/0.9=400 pulses. Theoretically, it can achieve 400/416=1600 pulses per 1mm. The carving accuracy is not shown here, and can be tested after assembly during replication. General carving work should be able to meet this requirement.
6) The circuit board is compatible with 5V, 250mw, and 12V 2.5 W laser heads. The 250mw uses the XH2.54-2P plugin, the 2.5 W laser head uses the XH2.54-3P plugin, and the 2.5 W laser head uses PWM dimming. It does not support the simultaneous use of two types of laser heads, and switching laser heads requires switching to different configuration files. Please note that the circuit board is not compatible with Borderless 1/2, and the overall layout has been adjusted
7) 2.5W laser head: 12V power input, 3-wire PWM/TTL control, with a low light mode button to turn on low light for focusing. When engraving, the low light switch needs to be turned off. The external dimensions of the laser head are 333378. The main reason for choosing this laser head is that it has a smaller size and does not require a large engraving machine design. The laser head is available in the same models on Taobao Sanwu Electronics and Xinrui Technology, and can be selected from 500mw, 1000MW, 1600MW, 2300mw, and 2500MW laser heads.
8) Memory card: The Fluid NC firmware clearly states that a 2GB memory card is not available, but a 16GB memory card has been verified to be usable. It is recommended to buy a branded memory card. I bought an 8GB one at a low price and cannot recognize it. I am not sure if it is due to the firmware not supporting it or a problem with the memory card itself.
Material Description
The required mechanical and electrical components are shown in the attached BOM table. This BOM table is all manually generated and may have deviations in quantity or model. If there are any deviations, please check the schematic diagram. We apologize for any inconvenience caused.
Precautions
1) The silk screen connected to the motor on the A4988 drive board: 1A and 1B are single-phase windings, 2A and 2B are single-phase windings. Stepper motors are generally labeled as A+and A – phase windings, and B+and B – phase windings. Special attention should be paid when connecting the circuit board to the motor.
I have marked the silk screen and motor wire color of the motor and circuit board on the circuit board. The wire color matches the motor I purchased. The motor wire color I purchased when replicating may be different from mine. Even if the color is the same, the motor winding and wire color may not correspond. It is necessary to distinguish the phase sequence of the motor winding by yourself. If there is a problem with the motor rotation direction, you can adjust the wire sequence of the motor extension wire to correspond to the silk screen wiring of the circuit board.
2) The coupling between the motor and the screw rod is 3D printed. During installation, the large end face of the coupling is attached to the motor, and it should be installed to the bottom. The screw rod should also be pressed against the output shaft of the motor to ensure concentricity with the screw rod when the motor rotates. The coupling has reserved a top screw installation hole, which is 2.5 * 2mm. You can choose whether to install it or not.
PCB